SoilWise Geopackage
QField – Operational Guide (QGIS ⇆ QField)
This short guide briefly describes:
- how to install the QField plugin (QFieldSync) from QGIS;
- how to identify the projects inside the provided GeoPackage;
- how to export/package the QGIS project for use with QField (Android, iOS, Windows);
- how to transfer the data to the device for use with QField (Android, iOS, Windows).
Important
This is an introductory guide; for more details on using QField and its plugin, please refer to the official QFieldSync for Cable Packaging documentation.
Install the QField plugin from QGIS
Step‑by‑step procedure
 Open QGIS (Desktop).
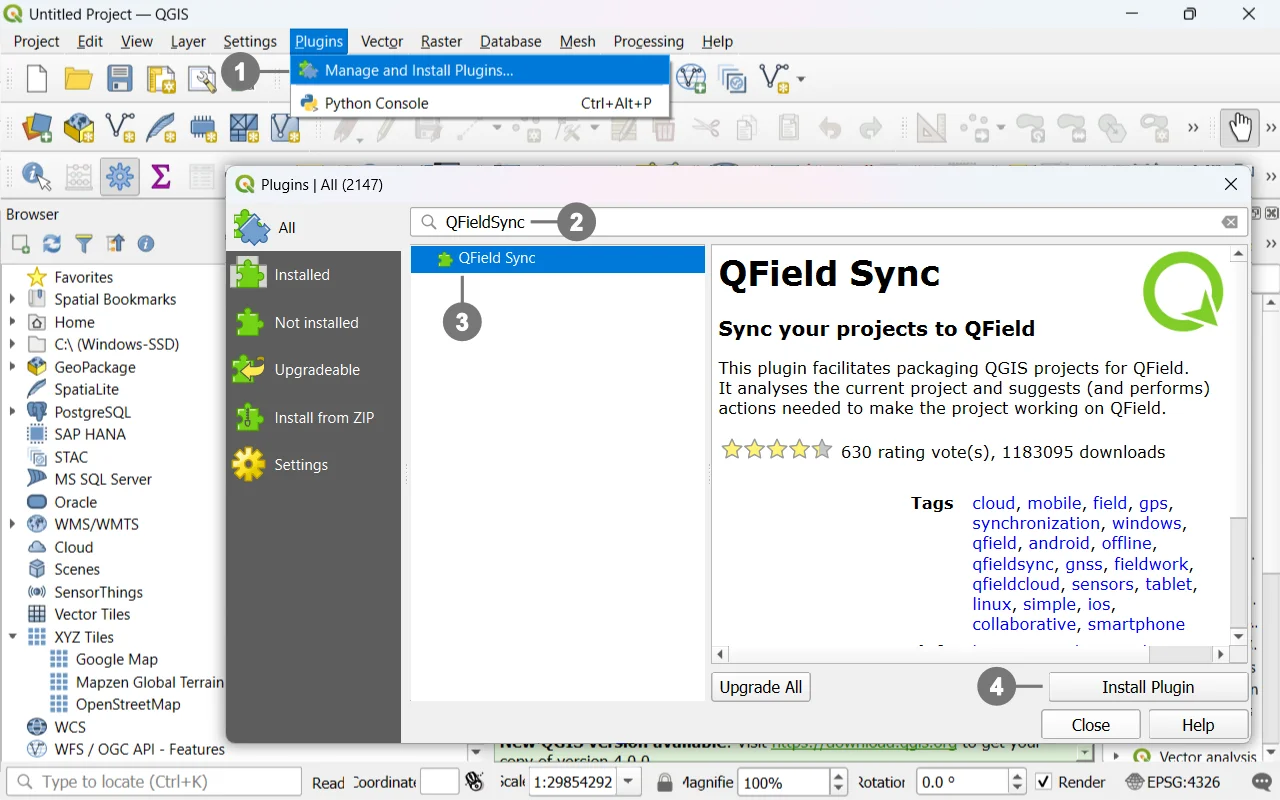
① Go to Plugins → Manage and Install Plugins…
In the search field, type “QFieldSync” ② (in some installations it is shown as “QField”).
Select QFieldSync ③ and click Install Plugin.④
(Optional) Verify it is enabled: Installed tab → check QFieldSync.
What the plugin enables
- Layer configuration for offline use (copy to GeoPackage, attachment handling).
- Export/Packaging of the project for QField.
- Conversion to relative paths, copying of resources (icons, media), inclusion of styles and forms.
Tip
Before exporting, always save the QGIS project and ensure paths are relative (Project → Properties → Paths) to avoid broken links on the device.
Identifying the project in the GeoPackage
The provided GeoPackage contains two different QGIS projects that point to the same data source (the same layers/tables in the same .gpkg):
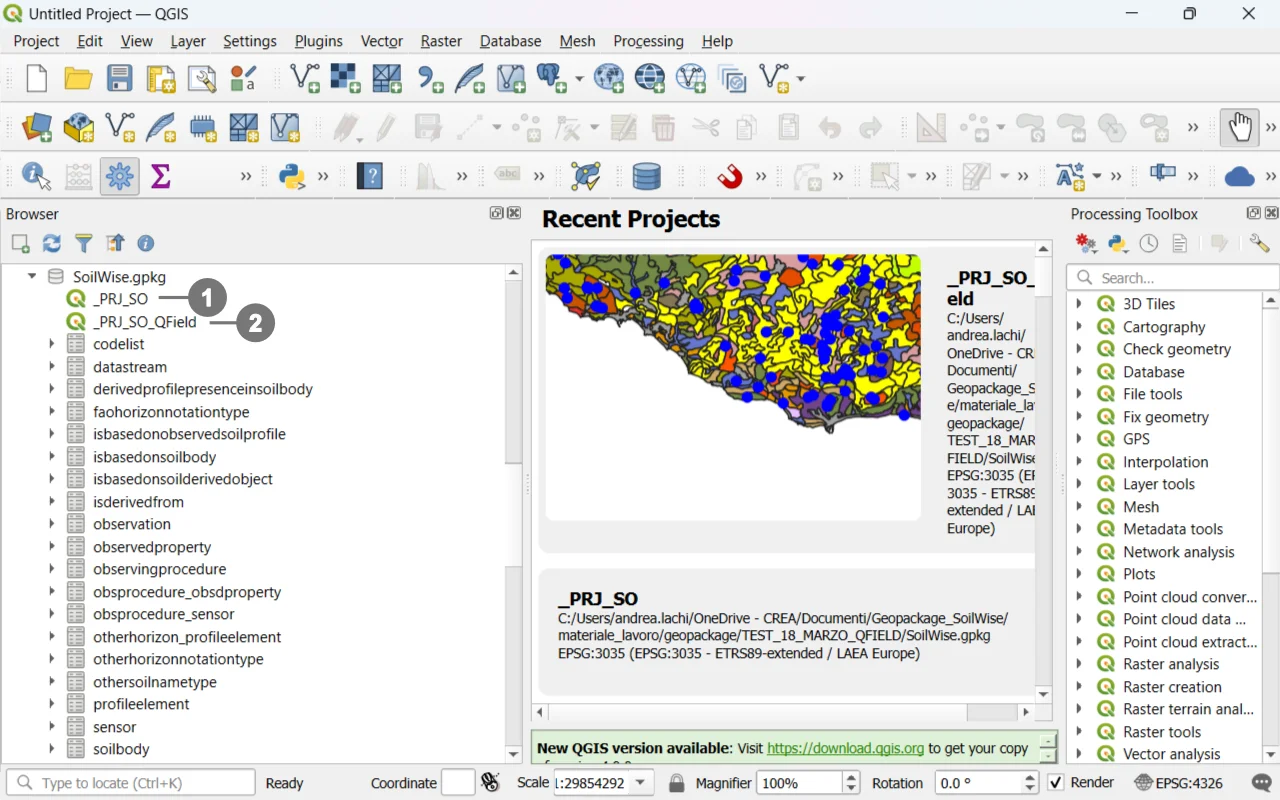 ① Project `_PRJ_SO` for QGIS – Optimized for desktop use (full symbology, views, and tools for office work).
② Project `_PRJ_SO_QField` for QField – Optimized for mobile devices with custom forms, pre‑filled fields, simplified widgets, and constraints for field data capture.
- Project
_PRJ_SOfor QGIS – Optimized for desktop use (full symbology, views, and tools for office work). - Project
_PRJ_SO_QFieldfor QField – Optimized for mobile devices with custom forms, pre‑filled fields, simplified widgets, and constraints for field data capture.
Both projects use the same GeoPackage as their data source; this ensures consistency and alignment between office work and field work.
Note
- Open
_PRJ_SOin QGIS when working on desktop. - Open
_PRJ_SO_QFieldin QField (or use it as the source for export via QFieldSync).
Exporting/Packaging the QGIS project for QField
 From the QFieldSync menu or toolbar, choose Export/Package for QField. ①
Select the destination folder. ②
③ Configure layers for offline use Project Configuration
④ Start the export: the plugin will copy data, styles, and resources, converting paths to relative ones.
Tip
For each layer, you can set the mode in Project Configuration:
- Copy to GeoPackage (recommended): creates an offline copy for field editing.
- Keep original path: keeps the reference to the external file (less portable).
- Read‑only: if it must not be edited.
Note
Unless there are specific needs, it is discouraged to change the project configuration. The full export of the GeoPackage can be performed without altering the configuration.
Typical resulting structure:
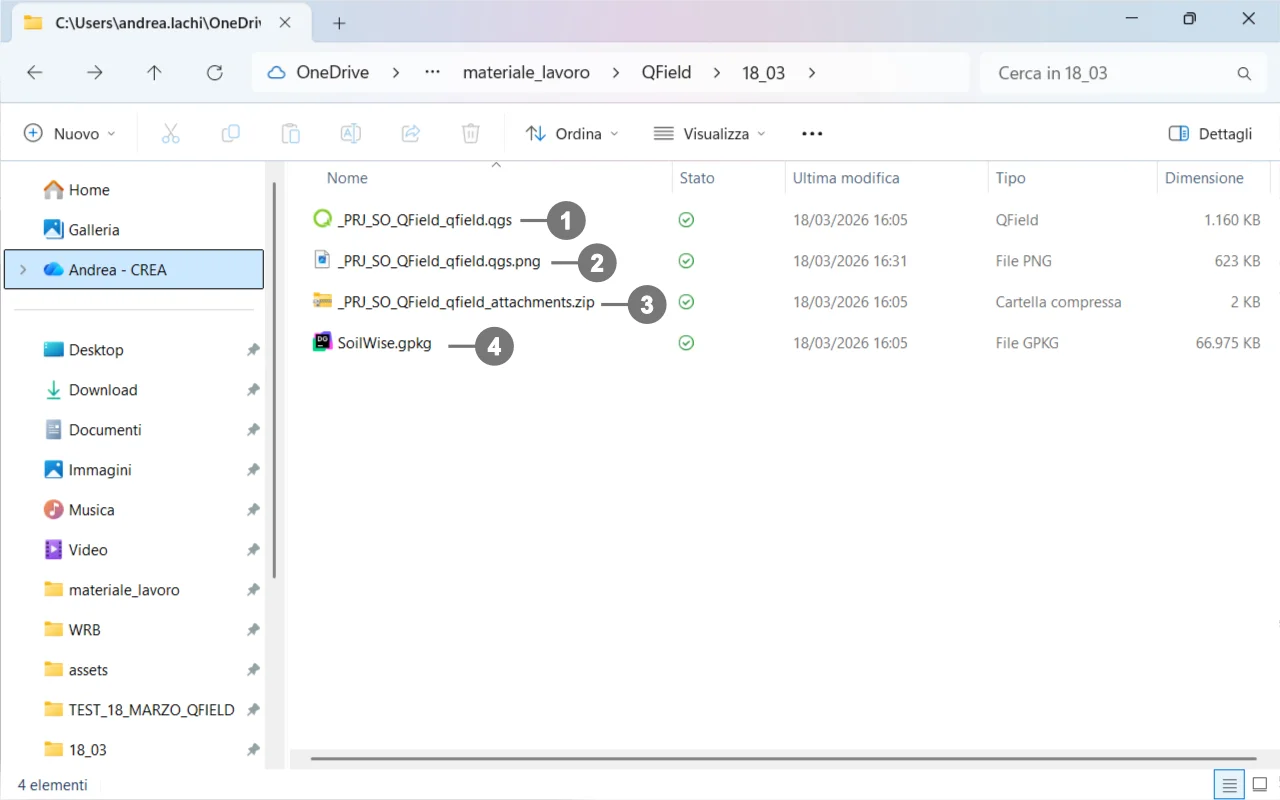 /Project_QField/
├─ project.qgs ① QGIS/QField project file.
├─ image.png ② Image used by the project (see notes below).
├─ package.zip ③ Archive for distribution/transfer/Project_QField/
└─ database.gpkg ④ Data store (GeoPackage).
What each file is for
-
.qgs→ The project file (map, layers, styles, forms). This is the file you open in QGIS and QField. -
Best practice: In QGIS, set Project → Properties → Paths → ‘Store relative paths’ to avoid broken links on the device.
-
.gpkg→ The GeoPackage that contains your layers/tables and, if configured, attachments. QField reads and (optionally) edits this file offline. -
.png→ An image referenced by the project. It may be used as one of the following:- Project icon (Project Properties → General → Project icon),
- Form image (a widget in a custom form),
- Raster symbol/marker in a layer style,
- Thumbnail generated during export.
Transfer to device
- Android/iOS: copy the folder/zip via USB or cloud (OneDrive/Drive/Nextcloud). On iOS, use the Files app or share directly with QField.
- Windows: copy the folder/zip and open the project with QField for Windows.
Warning
Write errors: make sure layers are not read‑only and that the device allows writing to the project folder.
Heavy rasters: consider resampling or using lighter tiles for better performance on mobile.
Synchronization of the QField‑edited project in the SoilWise Geopackage
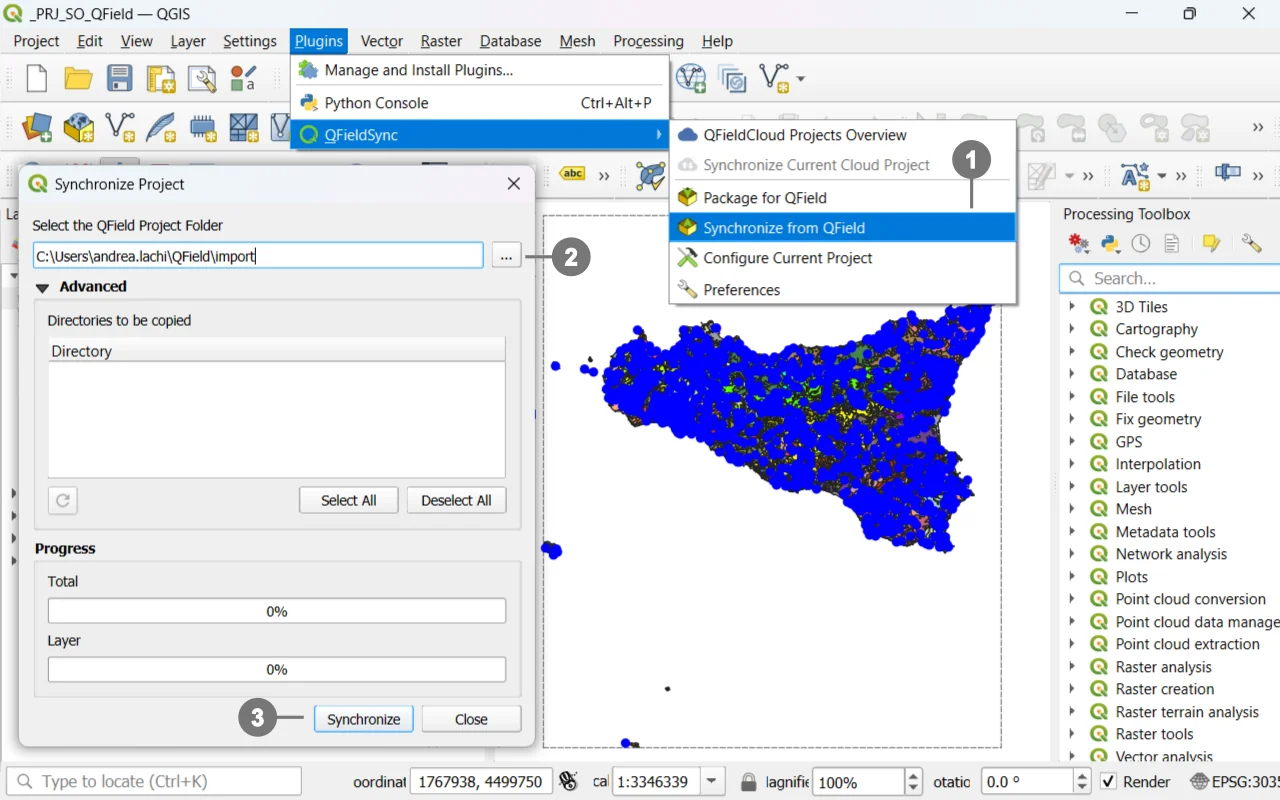 From the QFieldSync menu or toolbar, choose Sinchronize from QField. ①
Select the folder containing ② the QField project that you have copied back to your computer after the editing session, or directly access the project folder on the device if it is still connected.
③ Sinchronize