SoilWise Geopackage
Importing Geometric Features (QGIS‑only)
This guide describes two QGIS‑only ways to load geometry into the soilwise GeoPackage:
1) a native “out‑of‑the‑box” workflow using standard QGIS tools, and
2) a simplified workflow via a dedicated QGIS plugin (wizard‑style).
Geometry-bearing features in soilwise
- Soil Site — polygon
- Soil Plot — point
- Soil Body — geometry as defined by the official schema (e.g., polygon/multipolygon; confirm against the model)
- Soil Derived Object — polygon
- Datastream — polygon (optional)
Note
Before importing, confirm that each source layer’s geometry type (including multipart vs singlepart) matches the soilwise model expectation.
Warning
The target GeoPackage expects layers in ETRS89 / LAEA Europe (EPSG:3035) and enforces geometry types and integrity via constraints/triggers defined in the schema.
Prerequisites & Best Practices (apply to all methods)
- CRS: use the project-wide, agreed coordinate reference system and reproject sources before import when needed.
- Valid geometries: ensure geometry validity/topology (closed polygons, no self‑intersections, points within expected extent). QGIS provides native tools for validation and repair.
- Attribute schema: align field names, data types, and constraints (PK/UK, domains/codelists) prior to import.
- IDs/keys: guarantee primary key uniqueness; avoid duplicates.
- Multipart vs singlepart: respect the target model.
- Logging & traceability: record source, date, version, and procedure used (SQL, QGIS, plugin) for reproducibility and audits.
Method 1 — QGIS: copy/paste features into the GeoPackage
The import of geometries into an existing table of a GeoPackage with QGIS is structured in three main steps:
- Importing geometries as a layer in QGIS
- Copying the imported geometries
- Pasting the geometries into the GeoPackage layer
Let’s look at each step in detail.
1) Importing geometries
QGIS allows the import of geometries from various formats, such as CSV, Shapefile, or other GeoPackages. In this example, we will import data from a CSV file.
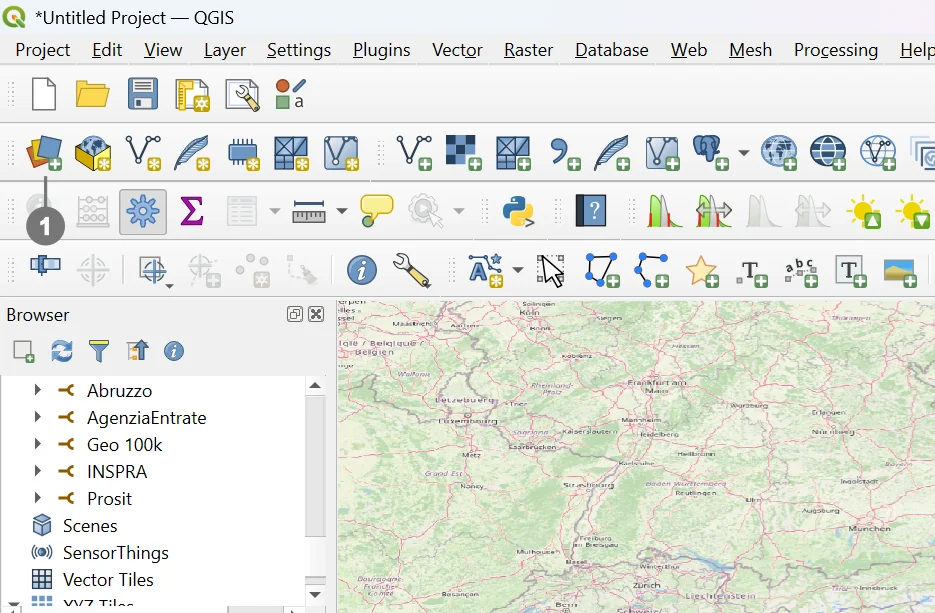 Click the Open Data Source Manager button ① in the QGIS toolbar.
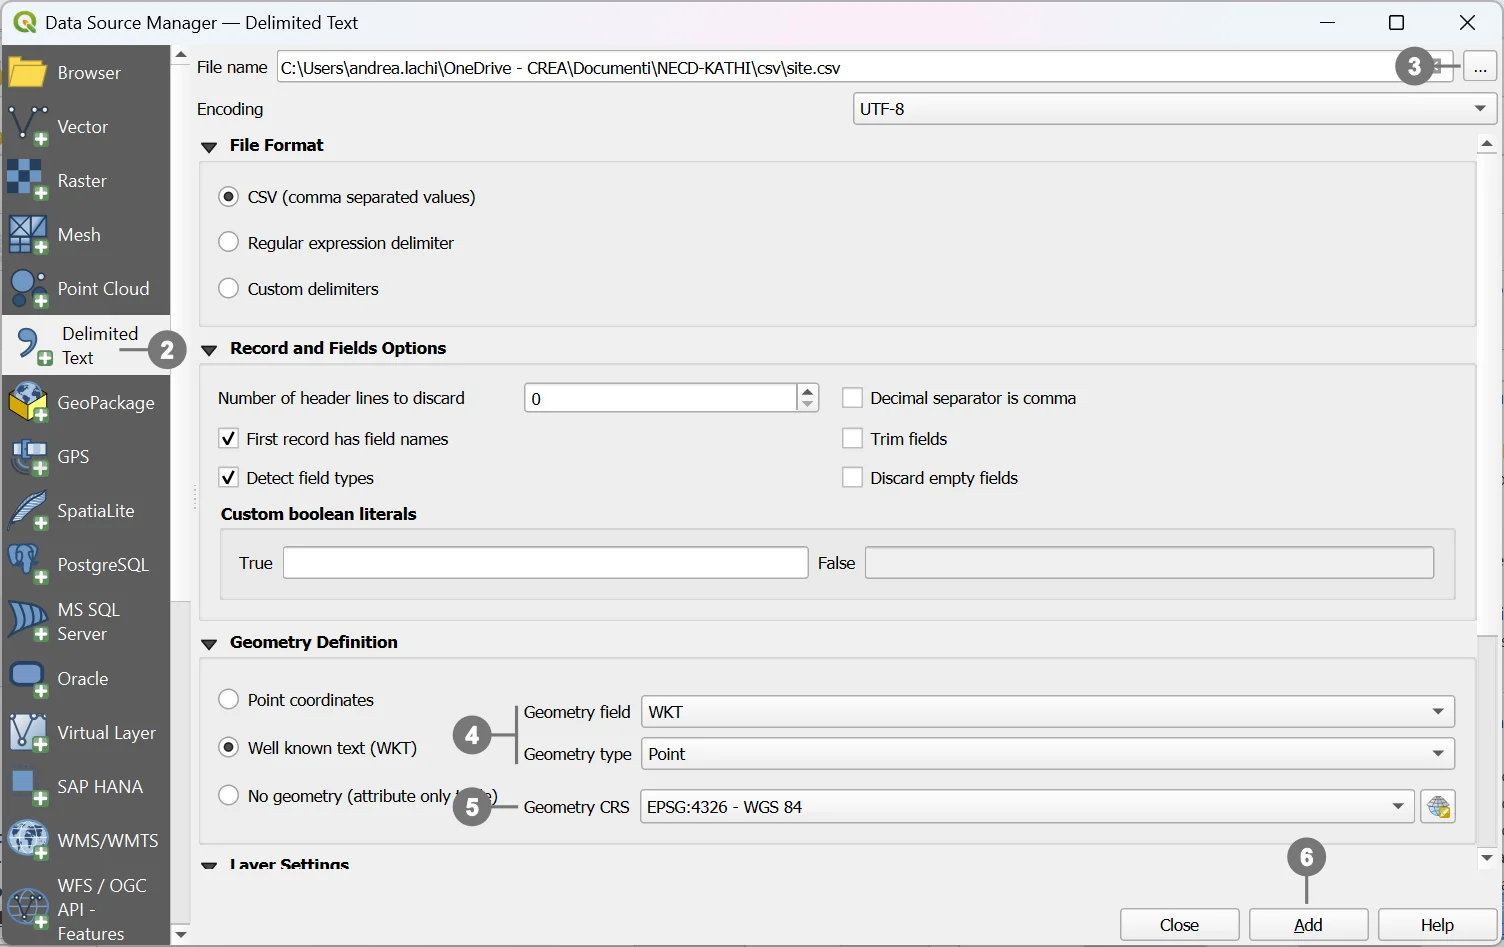 In the window that opens, you can choose from various data sources to import.
In our example, select CSV ② as the source format and proceed with importing the desired file ③.
Check the geometry type (e.g., WKT or coordinates separated into latitude/longitude) ④.
Set the correct Coordinate Reference System (CRS) ⑤.
Click Add ⑥ to create the layer (in this case, a point layer) in the project.
Warning
For the copy–paste operation to work correctly, the source layer (from which geometries are copied) must have the same fields (name and data type) as the destination layer, or at least match the required fields.
This check can be done during the import phase, later using QGIS tools, or by using an RDBMS to modify or remove unnecessary fields.
In this example, since the check was not performed during import, a temporary support layer named “copy” was created and used for preprocessing.
2) Copying geometries
 Import the newly created layer (if it is not already present in the project).
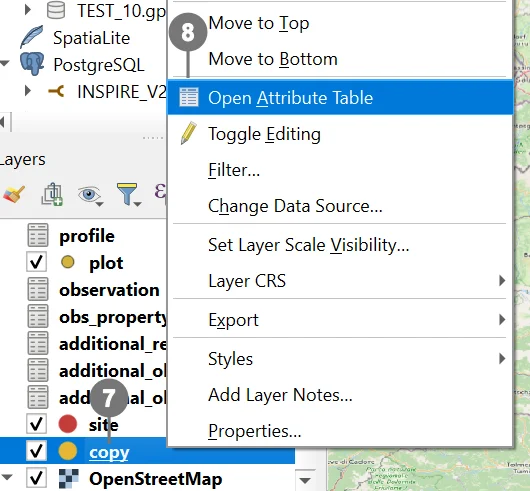
Right‑click the layer name ⑦ and, from the context menu, select Open Attribute Table ⑧ to view its data.
 Select all geometries ⑨
Copy the geometries ⑩.
3) Pasting geometries
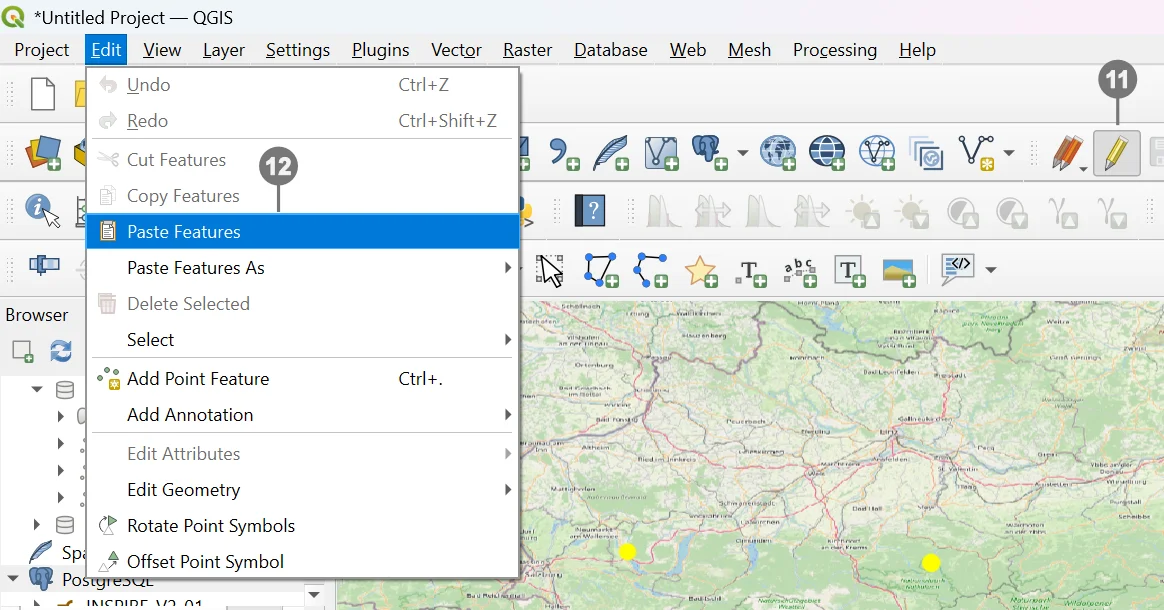 Enable editing mode on the destination GeoPackage layer using the Toggle Editing button ⑪.
Paste the geometries. ⑫
Save the changes.
Method 2 — QGIS: import via Plugin (simplified workflow)
QGIS plugin support
To support this procedure, there is also a QGIS plugin that simplifies and extends the described steps.
It is called AppendFeaturesToLayer and is available at:
github.com/gacarrillor/AppendFeaturesToLayer
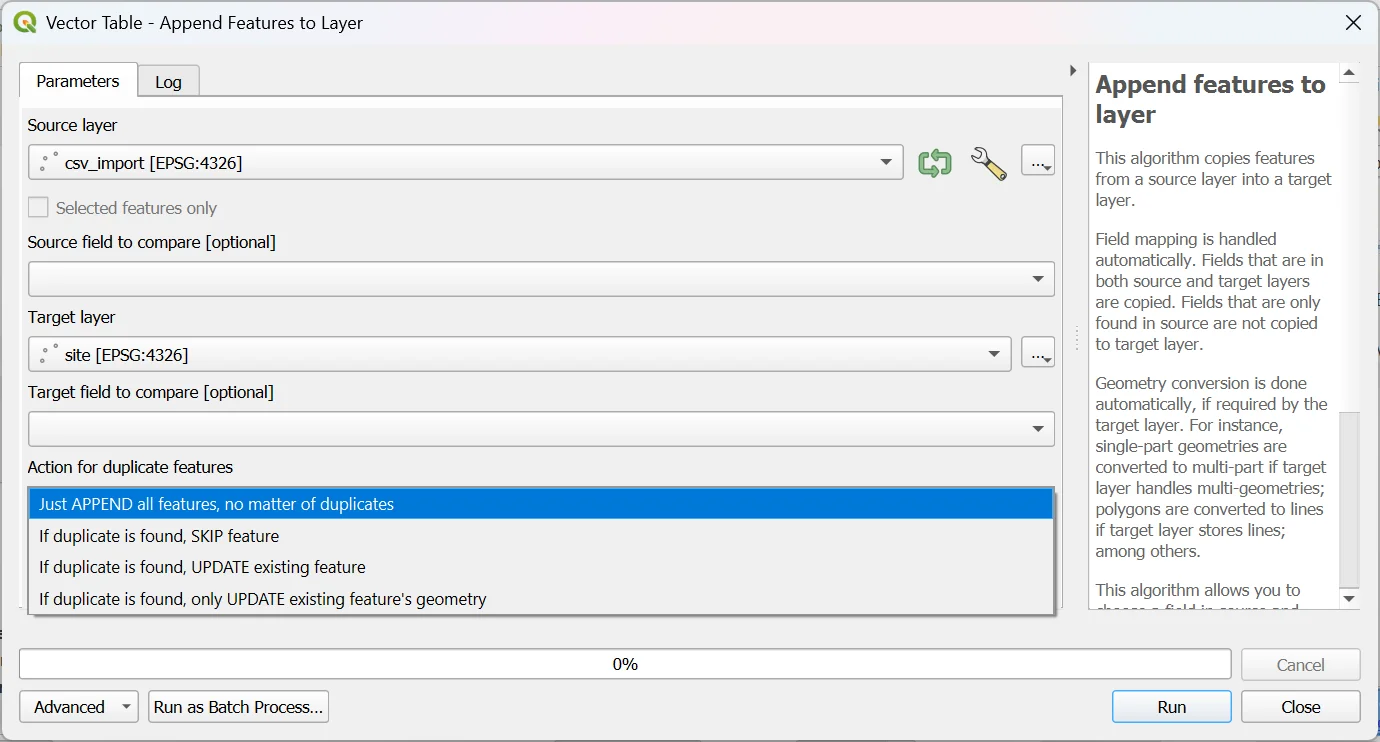
The plugin includes two geoprocessing tools:
- ETL_LOAD — allows easy matching of the source table with the destination geometry table.
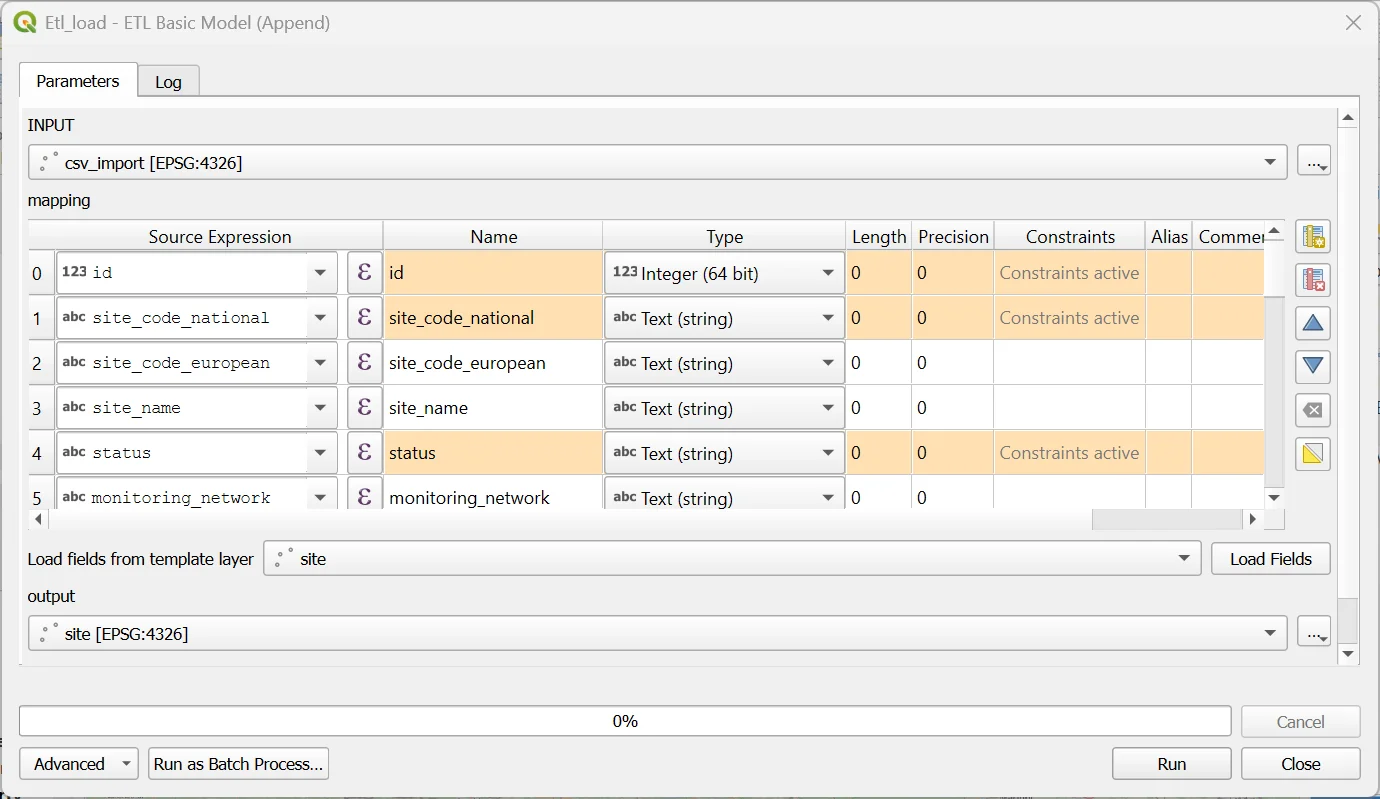
- Append Feature To Layer — handles the copy–paste operation with additional advanced options.
Alternative ETL tools (optional)
For complex mappings, schema reconciliation, and automation, consider:
-
HALE Studio — Open‑source ETL focused on harmonization toward standards (OGC/INSPIRE), with integrated validation and broad format support; helpful to define and document repeatable transformations. https://wetransform.to/halestudio/
-
KNIME — Visual data/ETL platform with hundreds of connectors/nodes; suitable for reusable and scheduled pipelines, DB integrations, and more. https://www.knime.com/