SoilWise Geopackage
Export to Excel
QGIS supports exporting layers to a wide range of formats to help you share, analyze, and report your data beyond the GIS environment. This short guide focuses specifically on exporting to Microsoft Excel (XLSX) using the project view view_observation as the working example. The same workflow applies—often with only minor differences—to most vector layers and database views you might have in your project.
Tip
For further information on the View Observation, refer to the view documentation
Export the View Observation in Excel
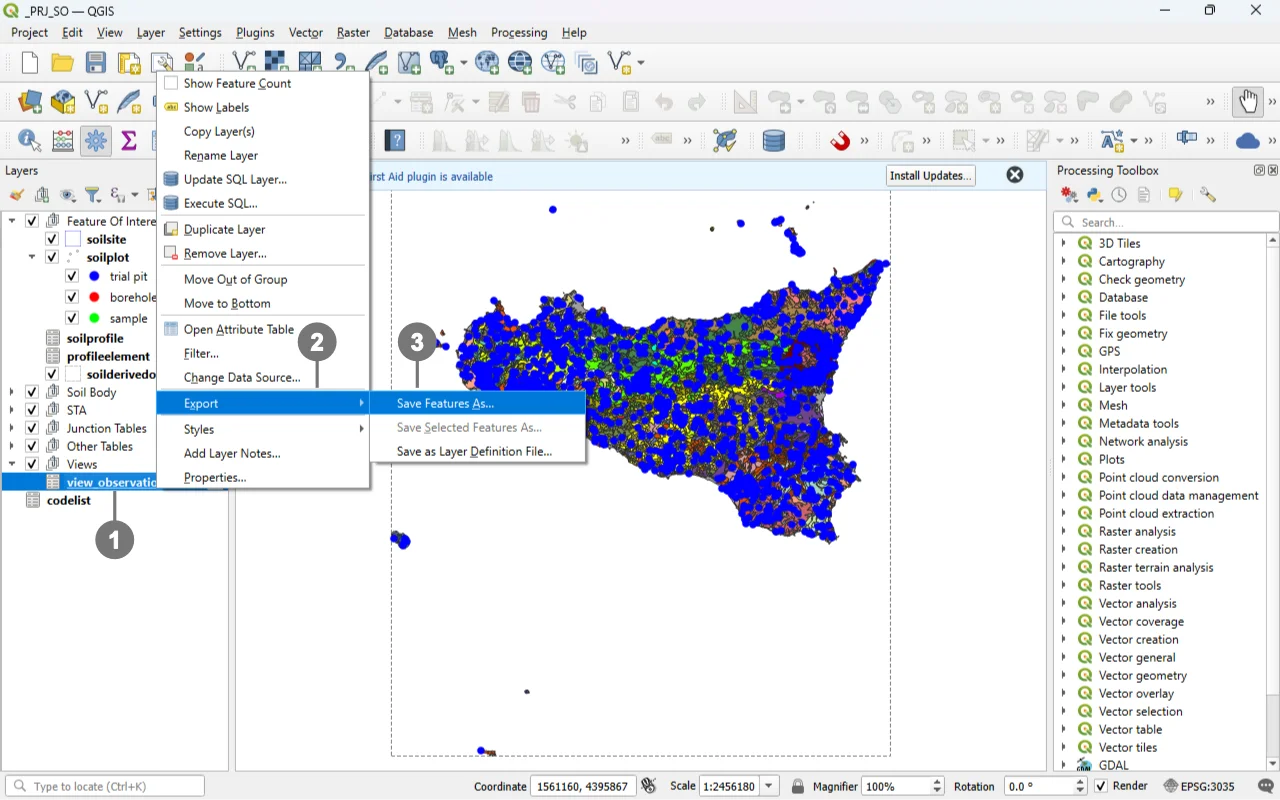 ① Select the object to export (in this case, your view) and right‑click to open the **context menu**.
② Choose Export.
③ Click ave Features As… to open the Export dialog.
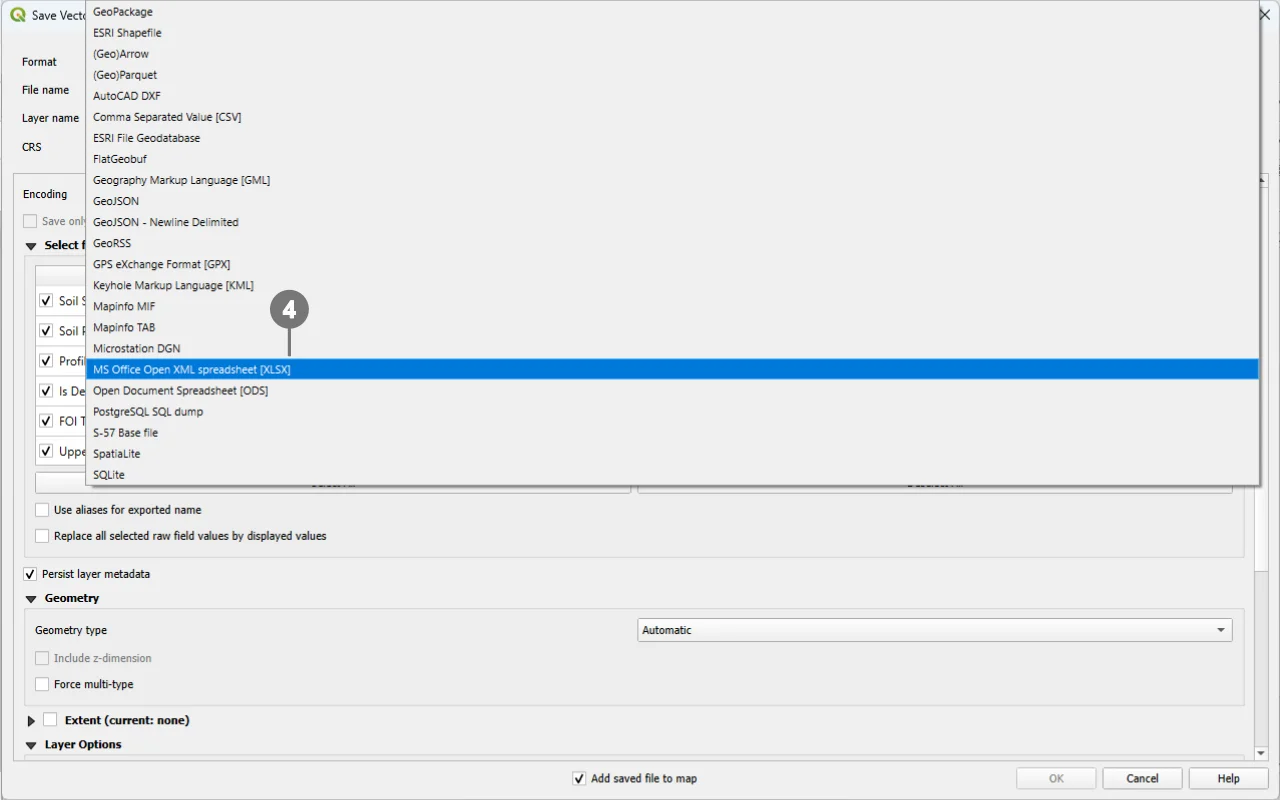 ④ In the Export dialog, select the output format you need (for Excel: `MS Office Open XML spreadsheet [XLSX]`).
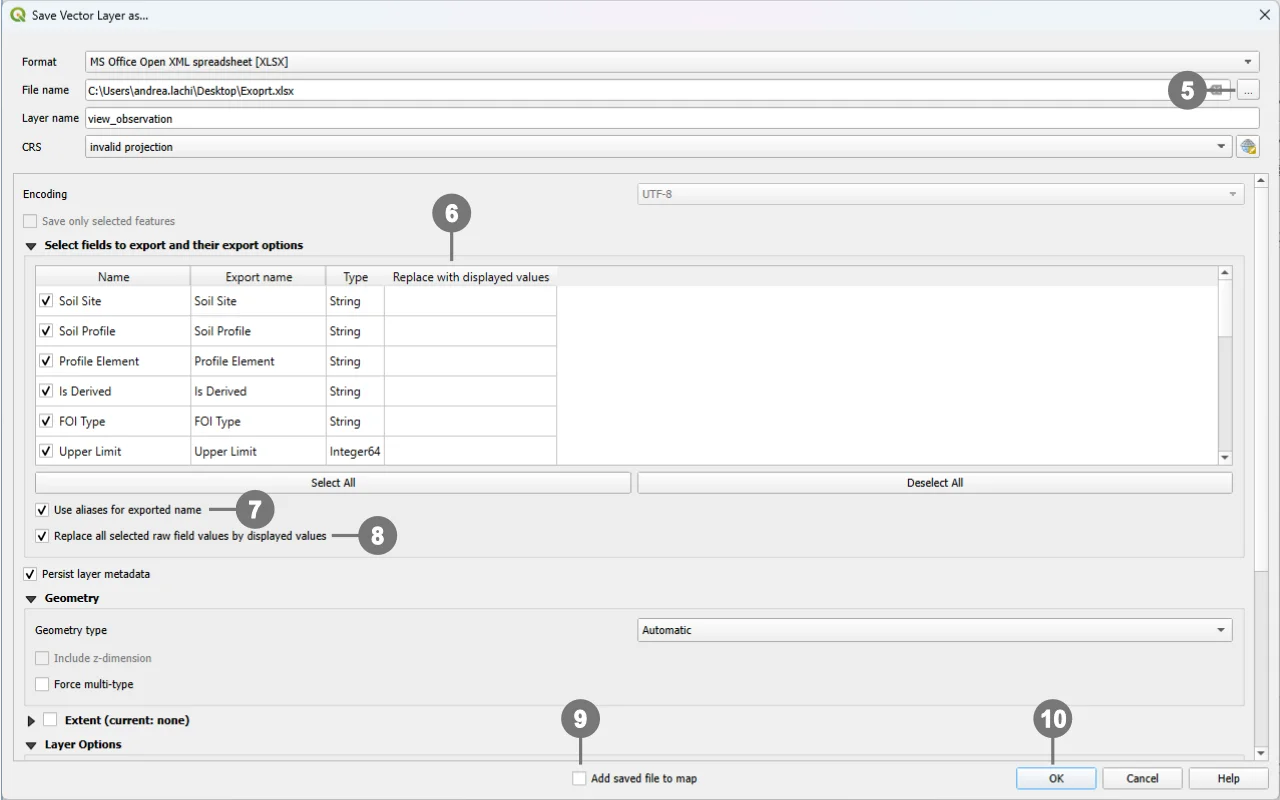 ⑤ Set the output file name and location. If needed, choose which fields to export ⑥ (by default, **all fields** are exported).
⑦ By flagging "Use aliases for exported name": column headers are exported using the field aliases (or the Export name set in the field mapping) instead of the raw database field names. This is useful when the file is intended for non‑technical users or when you need translated headers If the option is not selected, the original field names will be used.
⑧ By flagging "Replace all selected raw field values by displayed values": exports the values as displayed in QGIS (i.e., formatted values) instead of the raw database values—for example, Value Relation labels instead of keys, formatted date/time booleans as “Yes/No”, numeric formatting, etc. Enable this when you want a more human‑readable output; leave it unchecked if you need the original codes for further data processing.
⑨ (Optional) Tick the option to add the exported file back to the current project after export (e.g., *Add saved file to map*), then click OK ⑩ to finish.